The (30 minute) One Ring
The files, incl. the scene file (for this render) with the reflection map I used, can be downloaded here: Ring.zip
Some time back I ran across a ring tute on the web, but thought that I could offer an easier and more complete tute to the beginning LW user. So here goes:
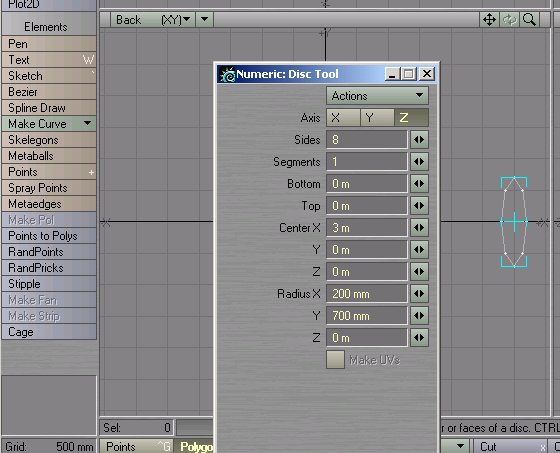
1. Open LW modeler and create a disk with eight sides, as shown in the numeric panel.
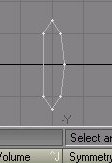
2. Go to the Point Edit mode and select the left
center point. Delete it (x).

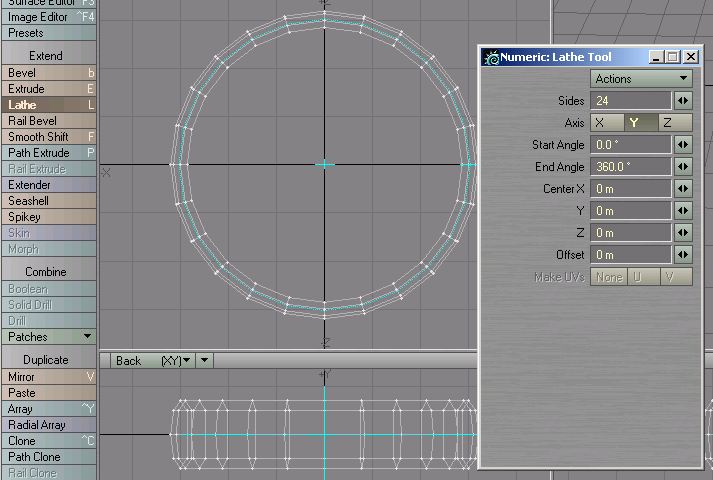
3. Go to Polygon Mode, Multiply/Lathe and make sure that your numeric panel is like mine. There's your ring.
4. Select the inside 24 polygons and then (q) name them. You can assign a temporary color at this time as well.
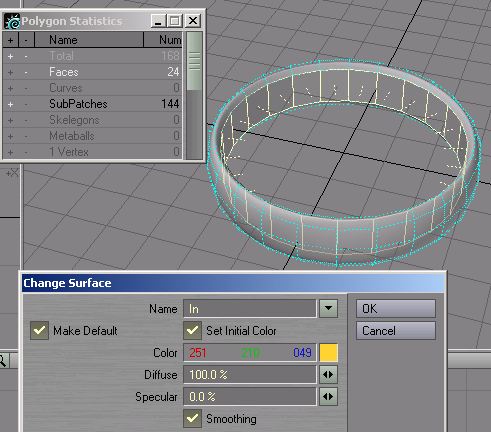
5. With the 24 polys still selected, go to Display/Select
Invert and then with the Change Surface panel (q) name the newly selected polys.

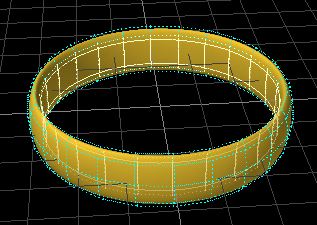
6. I colored everything the same, hit tab (changed the background of my TR viewport (d)) and here is a first look. Pleasantly One-ringlike. Save as Ringtute.lwo.
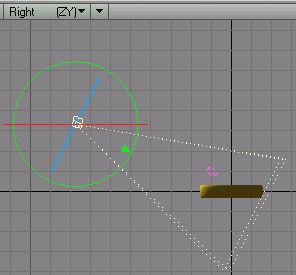
7. On to the Layout. Load Ringtute.lwo. Click on your camera and move it using (t) along the axes and with (y) rotate the ring back into view.

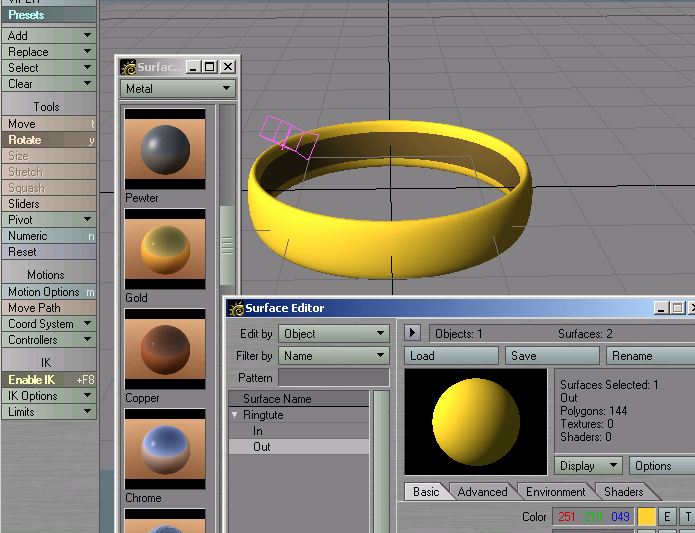
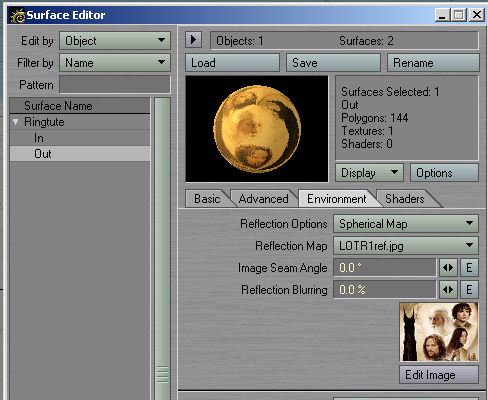
8. Next it's off to the Surface Editor. Select one of your surfaces, In or Out, and call up Presets. Go to Metal and double-click on Gold. Repeat this for the other surface, or, right-click on the finished surface and select Copy. Then go to the unfinished surface (still in the surface editor) and right-click again and, you guessed it, select Paste. Now we have a nice brown ring (yuck!)
9. Still in the Surface Editor got to Environment and select Sperical Map. Then pick a reflection map. I included this one in the Ring.zip. Here's a link for others: http://lordoftherings.movies-central.com/Lordoftherings_twotowers_wallpaper.htm. You can see the one I chose, and voila, we have an interesting looking ring.
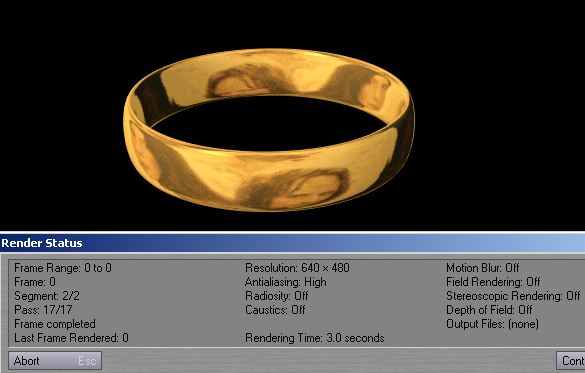
10.For a quick render go to Rendering/Render Options and selec raytraced reflections. Then select the camera, and choose the image size and antialiasing level. You can see those selections in the rendering panel below. This is looking nice already.
11. Next comes the script. This nice person placed it on the web. http://www.geocities.com/saberfilms/art_gallery/others/ring_writing.htm. I inverted it, cut it, cleaned it up.

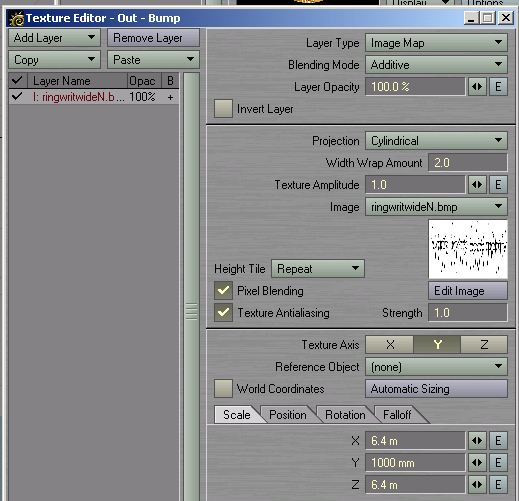
12. Download Ring.zip for the full-sized image (or recreate it yourself) . Go to the Surface Editor, and on the Bump line select "T". Then make the selections that I show below. That is, you will now load the ringwritwideN.bmp script, or a reasonable facsimile thereof. Make sure the projection is cylindrical and the texture axis is "Y". Then hit Automatic Sizing. All is well. Note: I used a Width Wrap amount of two. Your call. It doubles the script, and I like it that way.
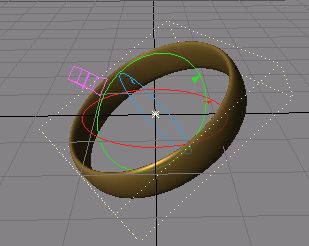
13. I tilted the ring a little for composition reasons. This is how it is in the file and the final picture.
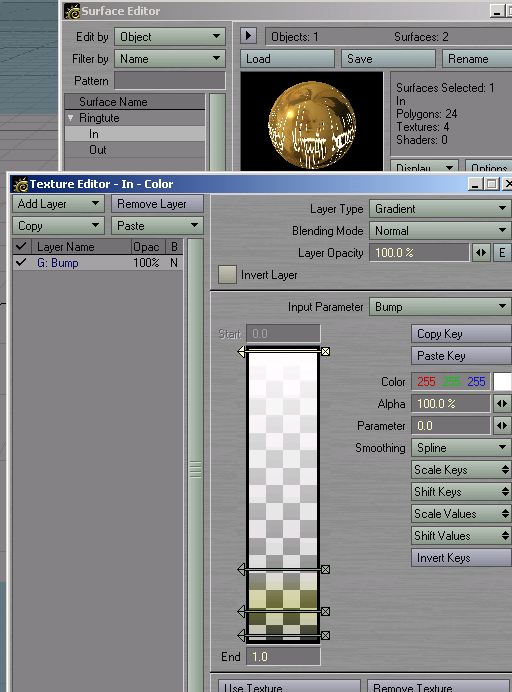
14. Alright. Now to the nitty gritty of the surface: Go to the Color Line of the surface Editor, and click on "T". Select the Layer Type "Gradient", and create a second arrow at the bottom of the gradient (Just click on the gradient field).Then go to Alpha, with that bottom arrow still selected, and change it to "0 %". I then created a third arrow to bias things toward more brightness. The bottom color will be yellow for a smoother transition between the ring metal and the writing. Then, since we want this to affect the bump (Elven Script), we select Bump as Input Parameter. And lo, the bump is white.
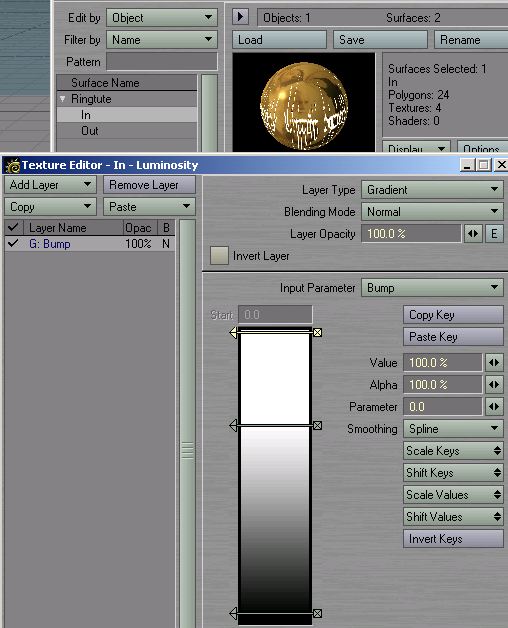
15. I did a similar thing with Luminosity, but used "Value" instead of Alpha. At the bottom arrow change the value to "0%". Again the third arrow was to allow me to manipulate the amount of luminosity coming from the script (bump). Make sure to set the Imput Parameter to Bump.
17. Repeat the above process for reflection. Same reasoning. Same control. Watch
the small preview image change as you slide the arrows. Also, you can try the
different Input Parameters that are available to you. I selected Light Incidence.
Try others and see what changes. In case of light incidence, if you have multiple
lights, select one of them. Just play with that. I think I may have gone, in
the file, to Incident Angle. It gave me a brighter surface.

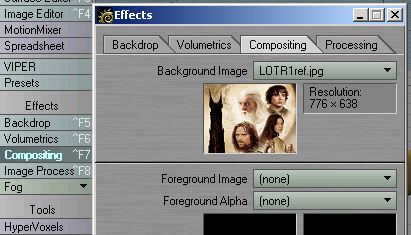
18. Lastly go to SCENE/Compositing and in Effects select the same picture that we used as reflection map as background image. The result will be the final image at the top of the page.
19.
Go to the website I linked, use different background and reflection maps.
Make the ring larger, the writing smaller, whatever. Change any of the variables
to suit your taste.
The files, incl. the scene file (for the rendered image) and reflection map
I used, can be downloaded here: Ring.zip
Created by Karl Stocker (pixeltek), a 3D hobbyist and occasional freelance artist. If you'd like to contact him, send email to: pixeltek@yahoo.com or visit his website at: www.cosmic-pearl.com